Chicken Stew

This is an easy recipe that I elaborated on and decided to share with y’all!

The original recipe was by Giada De Laurentiis from Food Network

Chicken Stew

2 Tablespoons olive oil
2 stalks celery, cut into bite size pieces
1 carrot peeled, cut into bite size pieces
1 small onion, chopped
Salt and freshly ground black pepper
1 (14-1/2 oz) can chopped tomatoes
1 (14 oz.) can low-salt chicken broth
1/2 cup fresh basil leaves
1 Tblsp. tomato paste
1 bay leaf
1/2 teaspoon dried thyme leaves
2 chicken breast with ribs (about 1-1/2 lbs. total)
1 (15 oz.) can of organic kidney beans, drained and rinsed

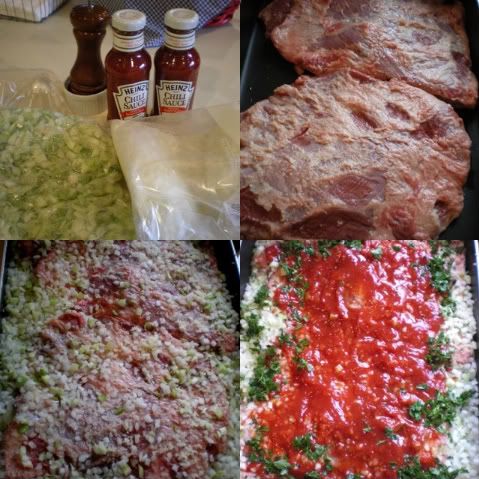
Heat the oil in a heavy 5-1/2 quart saucepan over medium heat. Add the celery, carrot, and onion. Saute the vegetables until the onion is translucent, about 5 minuts. Season with salt and pepper, to taste. Stir in the tomatoes with their juices, chicken broth, basil, tomato paste, bay leaf, thyme. Add the chicken breasts; press to submerge.


Bring the cooking liquid to simmer. Reduce the heat to medium-low and simmer gently uncovered until the chicken is almost cooked through, turning the chicken breasts over and stirring the mixture occassionally, about 25 minutes. Using tongs, transfer the chicken breasts to a work surface and cool for 5 minutes. Discard the bay leaf. Add the kidney beans to the pot and simmer until the liquid has reduced into stew consistency, about 10 minutes.

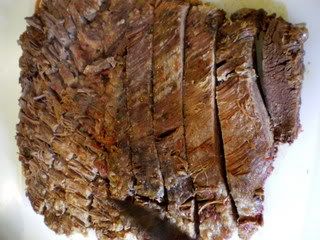
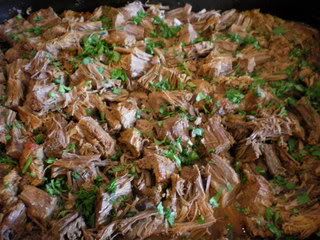
Discard the skin and bones from the chicken. Shred or cut the chicken into bite size pieces. Return the chicken meat to the stew. Bring the stew just to a simmer. Season with salt and pepper, to taste.


Ladle the stew into serving bowls and serve with good crusty bread.

So here are my variations: I doubled the recipe. I used a whole chicken instead of just breasts. I let the dark meat cook a little longer than the breasts. I used chopped tomatoes with jalapeno and chopped tomatoes with sweet onions and garlic. I used both kidney beans and a can of garbanzo beans (chick peas) I drained and rinsed both. I didn’t have fresh basil so I used dried. The last thing I did different was to throw in some fresh mushrooms!

Enjoy!

We had a full wonderful day yesterday exploring. Didn’t get home till 9:00 just in time to watch the New Season of Project Runway. Whoohoo! This happy old gal is tiii-rrred! Now to upload all the wonderful photos. Have a great morning everyone…

Slow Cooked Brisket

Barbecue Brisket

This is a great recipe for a crowd!

1 (5-pound) brisket
1 teaspoon salt
1/2 teaspoon black pepper
1/2 teaspoon paprika
1 onion, chopped
2 stalks celery, chopped
4 cloves garlic, minced
1 cup chili sauce
1 cup water
1/4 cup fresh parsley, chopped
1 (10-ounce) bottle of beer
Fresh parsley

Preheat the oven to 325 degrees.

Wash and dry the brisket, cutting away most of visible fat.
Sprinkle the brisket with salt, pepper and paprika.
Place the brisket, fat side up, in a heavy baking pan. Surround with the onions, celery and garlic.
Pour chili sauce on top of the brisket.
Slowly pour the water into the pan around the brisket. Sprinkle with the parsley.

Bake, uncovered, for 1 hour. Remove from oven and pour the beer over the brisket.
Do this slowly so it doesn’t wash off the chili sauce.
Cover the brisket and cook 3 hours longer or until tender.
Cool to room temperature. Place in refrigerator.
Remove any accumulated fat from the top.
Slice and reheat in the sauce.
Garnish with a sprinkling of fresh minced parsley.

Yield: 10 servings.

This recipe is from That’s My Home Free Recipes – Cattleman’s Barbecue Sauce

We served ours after baking it for 5 hours without refrigerating it. We cut it across the grain and shred it before serving also. We served it along with BBQ Sauce.

We also provided Potato Rolls for anyone who wanted to make it into a BBQ Sandwich. Yummy!

This is my big turkey roaster I cooked 2 – 5# briskets in here and all the extras fit in around them well for the baking time.

So the next party you have invite a crowd and let them bring the extras to go with the brisket. It will make for an easy breezy fun party for the hostess and guests!

Italian Wedding Cookies

This is one of several recipes for Italian Wedding Cookies out there. We had these cookies recently at a shower and I decided to share the recipe for Wendy at Ivory Spring and anyone else who might like it.

Ingredients:

5 cups flour
3 tsp. baking powder
1/4 tsp. salt
4 eggs
1-1/2 cups Sugar
1/2 cup melted crisco
1/4 cup softened butter
3/4 cup milk
2 tsp. Anise

Mix together the dry ingredients. Beat the eggs and sugar together. Add the crisco, butter, milk and anise. Work into dry ingredients. Roll into 1/2 thick rolls. Cut to desired size and place on cookie sheet. Bake at 350 degrees for approx. 10 minutes. When cool you can ice them.

Icing:

3 Tblsp. melted butter
3 Cups powdered sugar
3 Tblsp. lite whipping cream or 1/2 and 1/2.
2 tsp. anise

Mix together and if you want to add food coloring to coordinate with your event now is the time. Ice the cookies…

Hummingbird Cake ~ Recipe

Photobucket is holding all my photos from 2007-2015 hostage and they have blacked them all out. I’m slowly working at restoring my posts without their help. Such a tiresome bother!

I first saw this cake on Abigail’s blog, In the Garden. I decided to make it last Thursday night and Dear says it’s a keeper. You really do not need the cream cheese frosting but I’ll include the recipe for that, too. A little on top is nice. *We don’t know why it’s called Hummingbird Cake and no hummingbirds were harmed in any way in making this cake 🙂


Hummingbird Cake

Ingredients:

3 cups all-purpose flour
2 cups white sugar
1 teaspoon baking soda
1/2 teaspoon salt
1 teaspoon ground cinnamon
3/4 cup vegetable oil
3 eggs
1 (8 oz.) can crushed pineapple with juice
2 cups diced bananas
1 cup chopped pecans
1 teaspoon vanilla extract

Directions:

1. Preheat oven to 350 degrees F (175 degrees C). Grease and flour a 12 cup Bundt pan.
2. Measure flour, sugar, soda, salt, cinnamon, oil, eggs, vanilla into mixing bowl. Beat until smooth*. Stir in pineapple with juice, bananas, and pecans. Pour into prepared pan.
3. Bake in oven for about 70 minutes. (I checked it after 60 minutes) Turn cake out onto rack or plate after cooling for 20 minutes. Cool, and ice with cream cheese icing.


*My mixture never got smooth until I added the pineapple and banana and nuts. Then it got smooth quickly and I put it into the greased and floured pan.


Cream Cheese Icing

1-8 oz. cream cheese softened
1/4 cup butter softened
2 tsp. vanilla
1 lb. package powdered sugar

Beat cheese and butter till smooth. Blend in Vanilla. Gradually beat in powdered sugar.

Enjoy!

Photobucket is holding all my photos from 2007-2015 hostage and they have blacked them all out. I’m slowly working at restoring my posts without their help. Such a tiresome bother!

ht: Allrecipes.com

Monkey Bread? ~ Recipe

Easy Monkey Bread

I saw this recipe recently and forgot to write down where I borrowed it from. So sorry to whoever posted it. Let me know and I’ll give you credit. I don’t even know what it’s called but it really is similar to Monkey Bread so that’s what I’ll call it. Here’s the easy “how to” better known as a recipe.

Ingredients:

2 tubes (12 oz. ea.) refrigerated flaky buttermilk biscuits
1 Cup Brown Sugar
1/2 Cup Heavy Whipping Cream
1 tsp. good cinnamon (this is different from that bad cinnamon)

Preheat Oven to 350 degrees. Cut each biscuits into 4 pieces, arrange evenly in a 10″ fluted pan coated with cooking spray. (I used the new Pam baking spray with flour) Combine sugar, cream, and cinnamon, the good cinnamon not the bad cinnamon 🙂 Pour over the biscuits then bake for 25-30 minutes.  Note: I added chopped walnuts because I love nuts. I also layered one tube then added nuts and some of the blended goo then layered the second tube of biscuits added more nuts and poured the rest of the goo on top.


Assemble and put into the oven then enjoy the heavenly smells wafting through the house.

The result will look like this. You can gently flip it over onto a serving platter of some kind.

Enjoy! This is great for a Saturday Morning instead of a donut!

Photobucket is holding all my photos from 2007-2015 hostage and they have blacked them all out. I’m slowly working at restoring my posts without their help. Such a tiresome bother!

Recipe Round Up ~ Sandwiches

Italian Grilled Cheese Sandwich with Sauteed Zucchini

I saw Rachel Ray make something similar to this and I didn’t write down the ingredients but played it by ear to recreate something similar.


For the sandwich I used fresh mozzarella, tomatoes and basil. Any bread you like will probably be fine. I used a white farmers bread.  I cut the crusts off. I layered cheese, fresh tomatoes and fresh basil on a slice of bread then topped it with another slice. I heated a large frying pan with olive oil dipped each sandwich in the egg and milk mixture and then set the egg coated sandwich in the pan.


When browned on one side I flipped it over and browned the other side. Rachel Ray served something similar (she used sun-dried tomatoes and cut her bread in circles) and served it with some sauteed zucchini. Here’s how I made my zucchini.


Cut zucchini, drop into pan heated with olive oil. Salt and pepper well. Cut a bunch of scallions and add them to the zucchini. Grate or press a couple cloves of garlic over the zucchini. When the zucchini is done add some grated Parmesan on top. (I think Rachel Ray added some chopped parsley to the dish also).

Enjoy! For more Sandwich recipes head over to Dorothy’s at Field Stone Cottage.

For my Calzone Recipe that I posted earlier this year click here.

Photobucket is holding all my photos from 2007-2015 hostage and they have blacked them all out. I’m slowly working at restoring my posts without their help. Such a tiresome bother!

ABC Wednesday ~ J is for…

Blogspot bloggers!! Please do all of us bloggers a favor and add the “Choose an Identity that lets you put in your name and url without a google account” feature to your comment page. It makes life easier for those of us who aren’t blogspot bloggers. Please, pretty please, with sugar on top!
~

J is for

~

Our Son Josh who has brought lots of Joy to our lives! Click here to see him suspended in the air in China!


Johnson Bros. Dishes that I love to collect here and there if I find them at a bargain price.

And for your dining pleasure a lovely Applesauce Rasberry Jello Salad that is perfect for Spring and Summer and you can click here for the recipe.

For more ABC Wednesday Posts travel over to Mrs. Nesbitt’s.

Photobucket is holding all my photos from 2007-2015 hostage. I’m working on updating my blog posts very slowly.

Corned Beef and Cabbage ~ Recipe

Top of the mornin to yea! We made our Corned beef and cabbage early here in California since I’m leaving for Washington today on an early plane. Have a great Saturday. Ummm and about my walking totals this week. Dismal to say the least. Had a couple of good days but funerals and other happenings really affected the weekly totals. But I’m still walking. My average this week was 8295 steps per day. Have a great weekend everyone…

I bought the flat cut corned beef brisket seasoned in a package with an extra spice packet enclosed. I covered the brisket with water and brought to a boil with a couple onions quartered. After it came to a boil, I lowered the flame to simmer and let it simmer for a couple of hours plus. Then I took the brisket out of the pot and put it into a baking dish. I skimmed off the fat and then spread a spicy mustard on top of it and put it in 350 degree oven, covered with foil, for another 45 minutes. During this process I put all the vegetables in the broth to boil. When the broth came up to a boil again I lowered the temperature to simmer and let the vegetables cook till they were tender.

Then it was all ready to eat. Tender and seasoned just right without any extra seasoning…

Forgot to buy some Guinness to go with the meal but did find one of Dear’s home-brews that had a good healthy head to it.

Killarney

By Killarney’s lakes and fells,
Emerald isles and winding bays,
Mountain paths and woodland dells,
Memory ever fondly strays.
Bounteous nature loves all lands,
Beauty wanders everywhere,
Footprints leave on many strands,
But her home is surely there!
Angels fold their wings and rest
In that Eden of the west;
Beauty’s home, Killarney,
Heaven’s reflex, Killarney.

No place else can charm the eye
With such bright and varied tints,
Ev’ry rock that you pass by
Verdure broiders or besprints.
Virgin there the green grass grows,
Ev’ry morn Spring,s natal day,
Bright hued berries daff the snows,
Smiling Winter’s frowns away.
Angels often pausing there
Doubt if Eden were more fair;
Beauty’s home, Killarney.
Heaven’s reflex, Killarney.

Photobucket is holding all my photos from 2007-2015 hostage. I’m working on updating my blog posts very slowly.

My First Calzone Attempt ~


So this was simple and good. You start with the frozen bread dough you find in the grocery store. I thawed one loaf. Then I floured my surface. I separated the loaf into 3 equal parts. Yikes but when I went to roll out my first circle I realized I do not have a rolling pin in my condo kitchen supplies! What to do? Well I’m not a HomeEc major for nothing people. I’ve learned to improvise. The closest thing I could find in my condo that resembled a rolling pin was this…

A muddler! Wasn’t the simplest tool to use to roll out the dough to a seven inch circle but it worked.

I sauteed most of the filling ingredients before adding them to the circle of dough. You can choose whatever filling floats your boat. I chose red onion, mushrooms, green bell-pepper, and chicken sausage. After sauteing these together and getting rid of some of the moisture I spread a little marinara on the dough placed some soft mozzarella cheese on top of the sauce and then added the sauteed ingredients. Egg wash the edges like shown above and then fold it over and seal it. Give the top another egg wash and prick it with a fork. Bake in a 425 degree oven for about 15 minutes. And drum roll please…here’s how it came out.

It was very yummy! Oh and I was so proud that I got it to fit on a smaller plate to fulfill my brown plate challenge…

Photobucket is holding all my photos from 2007-2015 hostage. I’m working on updating my blog posts very slowly.

Nadia’s Kulich ~ Russian Easter Bread

Happy March everyone and because Easter is just 22 days from today I wanted to post the recipe I promised for my mother’s Russian Easter Bread, Kulich. The big question is…will ellen b. finally attempt making it this year??? We’re off for our beach walk and had a very busy day yesterday so I hope to get around to blogs later and a post about my Friday.

I promised my mom’s recipe for Kulich. Now what you need to know about my mom and recipes is that she ends up tweaking them from year to year so this recipe is the last written down recipe for her Kulich from 2001.

Ingredients:

16 egg yolks
4 eggs
5 C. sugar
1 quart whipping cream
1 quart half and half
1 T. salt
5 cubes butter ( 2-1/2 cups )
1/2 C. oil
1 shot apricot brandy
6 teaspoons powdered vanilla
Zest of 2 lemons
8 pkgs rapid rise yeast
1 T. sugar
1 Cup water and 1 Cup milk
About 10 lbs of flour

Of course most of you will need to cut this recipe in half or quarters cuz this is enough for an army (my extended family)

Add yeast to the cup of water and cup of milk. Make sure the liquids are lukewarm. Let this mixture dissolve and sit. In the meantime beat the eggs, only use a stainless steel bowl. (because mom says it will work better that way). Now add the 1 T. of sugar into the yeast mixture and stir to dissolve.

Cream the butter and sugar. Add the eggs to the butter and sugar mixture and mix to combine. Mix the half and half with the whipping cream and heat until lukewarm. Add the half and half mixture to the eggs. Mix in the vanilla and brandy. Add the yeast mixture and the salt and beat with a mixer. Continue beating and add the lemon zest. Continue beating and add the flour about a cup at a time. Once you cannot beat the dough any longer, put the dough on a floured surface and start incorporating the flour by kneading the dough. The dough should be kneaded very well approximately 10 minutes. You should knead the dough until you can cut it with a knife and it is smooth without any holes. Place the dough in a stainless steel bowl. Take some oil and pour a little on the dough and spread it all over the dough. Make sure to turn the dough so it is coated evenly. Cover with plastic wrap right on the dough and a dish towel on top of that. Place in a warm place away from drafts to rise. (My sister usually puts it into the oven that has been warmed slightly.

It is now time to prepare the coffee cans (1 lb. and 2 lb. cans are the best) Cut circles the size of the bottom of the cans out of wax paper. You will need four circles per can. Make sure the cans are well greased. Put the 4 circles in the bottom of the cans.


Use a empty and clean coffee can like the one above. Take the label off. You’ll need to use a can opener to cut the lip off the can. I hope these pictures will make the process easier to understand.

Cut sheets of wax paper long enough to line the sides of the can and tall enough to be 2″ above the rim of the can. Use crisco to seal the ends of the paper.

Here’s a can with the bottom and sides lined with the wax paper.

When the dough has doubled in size, punch it down and turn it over. Let it rise a second time until it doubles in size. Punch it down again. You will take a portion of dough about 1/3 the size of the can. Knead it and form it into a smooth ball that you can easily drop into the can. Let the dough rise again inside the can until it is at least double in size. Bake in a 350 degree oven until golden brown on top. Let them cool slightly in the cans. Remove them from the cans and then cool completely on their sides. Cover them with a towel and turn them several times so they keep their shape.


To go with this bread my mom always makes a wonderful sweet cheese topping that is formed in a mold in different shapes. For my mom’s Sernaya Paska (cheese spread) recipe click here.