Banana Blueberry Bread

We had a blueberry bush on our property in Kenmore and while we lived there I decided to combine some of the fresh berries with banana to make this loaf.

Ingredients:

  • 2-1/2 cups flour
  • 3 teaspoons baking powder
  • 1/2 teaspoon salt
  • 3/4 cup walnuts
  • 1 cup sugar
  • 1/3 cup soft butter
  • 1 egg
  • 2 medium ripe bananas, cut up
  • 1/2 cup milk
  • 3/4 cup fresh blueberries

Method:

  1. Preheat oven to 350 degrees F.
  2. In medium bowl, sift together the flour baking powder and salt, set aside.
  3. Using a blender chop the walnuts and add them to the flour mixture.
  4. Put the sugar, butter, egg, bananas and milk in the same blender container that you chopped the walnuts in.
  5. Blend on medium for 15 seconds or so stopping the motor to push the bananas down if needed.
  6. Pour over the dry ingredients and mix for a few strokes then fold in the blueberries and mix carefully till well moistened.
  7. Pour batter into greased loaf pan, 9x5x3.
  8. Bake in preheated oven for 55-60 minutes or until tester comes out clean.
  9. Cool on rack.
  10. Serve warm with butter or cream cheese.

Yield: 1 loaf

Fishing for Answers Hodgepodge

Another week and another Hodgepodge. Thank you, Joyce!

1. When someone finds out what you do or where you’re from, what’s a question they always ask? 

When I say Colville (pronounced Call-ville) people get a puzzled look on their face.

It seems most always I need to add…”It’s a small town in the Northeast corner of Washington State about 70 miles north of Spokane and about 35 miles from the Canadian border.

2. Did you participate in ‘Greek Life’ when you were in college, or have children who did? If so what was your experience like? Taking another tack…have you ever been to Greece? If not, is that a destination on your bucket list? 

My answer is no to all the above. Growing up with immigrant parents who escaped communism made my parents and us in turn skeptical of many organizations and we saw them as unnecessary in our lives.

Greece would be a very interesting place to visit, especially for the Biblical history there, but it is not on my bucket list.

3. Do you like Greek food? If so what’s your favorite dish? 
Photo above from a great Greek restaurant in Walla Walla that our family enjoyed a while back.
Yes, I do enjoy Greek food. We just enjoyed home made Gyros at Dan and Jamie’s to celebrate Josh and Laura’s 24th Anniversary. Home made gyro meat, home made pita bread, home made tzatziki. It was all delicious.
4. What incredibly common thing have you never done? 
I don’t believe that I’ve ever fished or if I have I’ve totally forgotten it.
I’ve been to ‘Fishing’ parties and played fishing games.

5. What is a telltale sign that you’re upset? 

My hands will start shaking more than usual or my voice will be shaky.

6. Insert your own random thought here. 

Here’s another great Summer salad.

Greek Salad
Ingredients:

  • 1 cup cucumber chopped
  • 1 cup tomatoes, chopped
  • 1/2 cup canned chickpeas (garbanzo), drained, rinsed.
  • 1/4 cup Kalamata olives, pitted, sliced
  • 1/4 cup scallions, sliced (you can substitute red onion here)
  • 1/4 cup coarsely chopped parsley
  • 1/2 cup crumbled feta cheese
  • Juice of 1 lemon
  • 1 clove garlic minced
  • 1 teaspoon sugar
  • Salt and pepper to taste
  • 2-3 Tablespoons extra-virgin olive oil
  • 3 Tablespoons fresh mint, chopped

Method:

  1. Combine the cucumbers, tomatoes, chickpeas, olives, scallions, and parsley in a large bowl.
  2. Whisk together lemon juice, garlic, sugar, salt, and pepper for the vinaigrette in a bowl.
  3. Drizzle olive oil into lemon juice mixture in a steady stream while whisking, after it emulsifies stir in mint and adjust seasonings to taste.
  4. Pour over the combined ingredients and mix well.

Double the recipe if you are serving this as a main dish. This recipe would serve 2 as a main dish.
As a side it serves 4-6 people.
I used the whole English Cucumber for the salad pictured above which was probably 2 cups or more of the cucumber.

Apple Walnut Crisp

Apple Walnut Crisp

Ingredient:

  • 1 cup brown sugar
  • 1-1/4 cups rolled oats
  • 1 cup all purpose flour
  • 1/2 cup melted butter
  • 1/3 cup chopped walnuts
  • 3 cups apples – peeled, cored, then sliced or chopped
  • 1/3 cup white sugar
  • 2 teaspoons cinnamon

Method:

  1. Preheat oven to 350 degrees
  2. Lightly grease an 8 inch square pan.
  3. Combine brown sugar, oats, flour, nuts, and butter in large bowl.
  4. Place half of this crumb mixture into pan and press down.
  5. Cover this layer evenly with apples.
  6. Sprinkle the apples with the white sugar and cinnamon.
  7. Top with remaining crumb mixture.
  8. Bake in preheated oven for 40-45 minutes or until golden brown.

Serve with whipped cream or ice cream and enjoy!

Happy Monday everyone.

V is for…

For April I’m challenging myself to an A-Z photo a day excluding Sundays and in addition to any regular posts that come to be.

Today is Friday April 25th and we are on the letter V.

V is for Vareniki or Vareniky~ A Russian traditional cheese filled dumpling. I will add a recipe at the end of this post.

The first sets of vareniki day in Southern California are when our mom was still on this earth.

I think this set of photos is from 2004.

In 2008 while Greg and I were living in Camarillo I was able to join in for the family day of making Vareniki for our Christmas celebration.

This photo above is from 2012, the last Vareniki day with our mom. Our mom was promoted to heaven in September of 2013.

The next set of photos are from Vareniki day in 2020.

Vareniki are a Russian treat we’ve enjoyed at Christmas for many years. Vareniki can be enjoyed any time of year but our family has made it our Christmas dessert tradition. This year the crew included my two older sisters, one sister-in-law, 4 of our nieces and one grandniece. My mom would be so proud of them all!

My oldest sister Kathy with the finished product which is first boiled and then ready to freeze and then bake in half and half and butter on Christmas Eve. Our family tradition is to stuff these dumplings with a cheese filling and serve them as a dessert or for breakfast in place of pancakes. We serve them with a dollop of sour cream and maple syrup.

Pierogi and Vareniki are actually the same thing. Again, stuffed dumplings, they are common throughout Central and Eastern Europe and most of the old Eastern Bloc states. While Vareniki is the more commonly used term in Russia, pierogi are the national dish of Poland, Ukraine and Slovakia.

Here’s the recipe from our family cookbook that our sister Vera created.


M is for…

For April I’m challenging myself to an A-Z photo a day excluding Sundays and in addition to any regular posts that come to be.

Today is Tuesday April 15th, Tax day in the USA. It’s time for the letter M.

M is for Mennonite Girls Can Cook.

Lovella wrote this post that I am sharing here on my blog. She wrote this for our 10 year anniversary back in 2018 and published it on the MGCC Blog.

Mennonite Girls Can Cook ~ Ten Years

Ten years ago, this blog began on a whim that blossomed into an extraordinary compilation of our Mennonite recipes. Ten women volunteered to make, photograph and post on this blog so that our families and future generations will have this integral part of our heritage preserved.

The first idea for MGCC began during a sleepless night on June 5th, 2008.  By 9 AM the next morning I had sent out a casual invitation on my personal blog. It was Vee who commented on that post saying “Sounds like great fun! I know you Mennonite gals know how to cook!!”

That is how the name Mennonite Girls Can Cook came to be.  There was no business plan or goal as to how many recipes we would post.   It is because of how it all fell into place that we have known in our hearts that God provided an opportunity for us to use the gifts He gave us,  to bless others,  and to give Him glory.

I love telling the story of how we were so thrilled to realize that our blog was being read.  Within the first week, we were tracking several hundred visitors per day.  Later we admitted it was only the ten of us coming back over and over to see if we had any comments on our recipes.

It wasn’t long though and you really did come to visit our blog and you kept coming back and your encouragement took us from the beginning idea of posting our Mennonite heritage recipes to also include our family favorite recipes and experiments from our own kitchens.

It is now not unusual for us to welcome over ten thousand page views on any given day. We are so delighted that this has become a place where recipes are searched, and where we have been able to freely share our faith.

We also recognize that God led us to make some decisions back when it all began.  We decided that if there was ever a way for us to raise money from anything connected to the blog, we would feed hungry children.  We decided we would keep our blog beautiful without automated advertisements.  Our sponsors on our sidebar quietly have donated to our charities and we have appreciated them for their generosity.
We also decided that we wouldn’t pursue a publisher but if one approached us we would welcome an invitation to do a cookbook.  In the spring of 2010, we were approached by Amy Gingerich the Editor of Herald Press, to see if we wanted to do a cookbook with them.
Our original Mennonite Girls Can Cookbook featuring Mennonite Recipes and our family favorites became a Canadian bestseller within a few months thanks to all of you who bought up books everywhere they were available.
Early in 2012, we started to work on our Celebrations book which was a delight to create as we reflected all the seasons that we have experienced in life.  During that summer, we met together once more to take photos and have a very special tea time that we shared with you in the pages of the book.
Our Bread for the Journey book was published to coincide with the opening of the play Mennonite Girls Can Cook.  This book has been a place where we have shared our Mennonite family history stories and have shared what our faith means to us in daily living.   We used that opportunity to put into print some of the recipes that have been most searched on the blog.
We have been reflecting in our daily chats with one another how we had never ever imagined the opportunities to share.  Television interviews across Canada, newspaper and magazine interviews, traveling for book signings,  cooking demonstrations, speaking opportunities, and the play called Mennonite Girls Can Cook have all had an impact on increasing our visibility.
We are so thankful for all those that donated to projects on our behalf.
We realize that God gave us this journey of ten women for a purpose. God gave each of us a gift and we have sought to be faithful in sharing that gift with you through our recipes, our books and through our devotionals.
So I ask you to make full use of the gift God gave you when I placed my hands on you. Use it well. 
2 Timothy 1:6
There is still a lot for us to accomplish on our blog. While we will not be posting new recipes, we will continue to tweak our past recipes, redo some old photos and rework our recipe index to make it easier to find your favorites. Our best recipes will be highlighted during the different seasons of the year. You can be sure that the new year will begin with Portzelky, Paska will be front and center at Easter, Rollkuchen in summer, harvest recipes in fall and Oma’s cookies at Christmas.  We feel certain that there are many recipes that you haven’t tried and we hope that by making the recipe index easier to navigate, you will feel inspired to search and try something new to you.
There are many things that we will miss, most of all, our connections with you through your faithful comments.  Thank you for your encouragement that kept us motivated to do our work to the best of our ability.  Thank you also, for all the cookbooks and devotional books that you have purchased in the past and will continue to purchase.  Every dollar that we earn through those cookbooks will continue to provide clean water for the thirsty, and food for the hungry.  Because of your support, we have been richly blessed to give where God has led us.
Before I press the publish button for the last time, I want to tell you about the beautiful women that have worked alongside me.  They have all had such a vital impact on my life.  They have encouraged me in my walk with God.  They have encouraged me to strive for excellence.  They have opened their hearts to friendship and unity.  They have allowed me to glean the wisdom they have and they are faithful to pray for needs within our group and are quick to bring praise to God.
None of them signed up to take turns posting recipes every day for ten years and yet as this project grew, their hearts were open to using their gifts knowing that it could help others. I pray that wherever God leads them in the years to follow that they will continue to inspire others with the beautiful gifts they have.
When I tell you how each is unique, you will understand how we have needed each other and how our group was brought together by God.
 We have become faithful friends because we have been thankful for each other.
Anneliese opens her home with joy to host and to serve. Anneliese has the gift of creative writing.  She has used her gift to edit our books and to write poetry and stories that warm our hearts with truths. She has often helped me in thinking through how to communicate something in writing.
When you have reached out to us on our contact page, it has been Anneliese who answered your questions.
 In Anneliese, I value her sincere heart, her example of hospitality, and her attention to detail.
Betty delights in serving. She is well known for treats she brings to appointments, workplaces, and is a source of take-out meals for those she loves.  Every Saturday morning, Betty has sent out an email to all of us, reminding us of our scheduled recipes. She never missed a Saturday and she never forgot to post her own recipe.
 In Betty, I value her cheerfulness, her patience, and her humility.
Charlotte has the gift of caring deeply about people with compassion and empathy.  She is gentle and kind and looks for ways to bless others. Her large friendship circle is a testimony to the way she treats those she knows.
Charlotte has forwarded the comments and questions that you have made on our posts to us.
  In Charlotte, I value her capacity to love unconditionally, her listening ear and her empathy.
Bev somehow manages to juggle many things in a day and still host neighbors, family, friends and those that stop by, without exhibiting any bother or fuss.  She truly loves to host and does it with flare.  Bev also is generous and willing to help wherever help is needed.
Bev has diligently indexed all the recipes making it easy when you are wondering what to make.
In Bev, I value her willingness, her honesty and her heart of reconciliation.
Ellen has the gift of hospitality that she shares with family and friends and their church group.
Ellen has been our voice on Facebook, always introducing each mornings recipe in a way that will pique your interest.
In Ellen, I value the twinkle in her eye, the way she listens before speaking and her discernment.
Judy is our calm and steady peacemaker who encourages and sees the best in everyone.
She has a keen eye for detail and has often quietly tweaked our spelling and grammar in the morning when necessary.
Judy has been faithful in posting our daily recipes to Pinterest.
In Judy, I value her sense of diplomacy, her logical thinking, and her kindness.
Julie is a prayer warrior.  If you have ever requested prayer on our blog, it has most often been Julie that has led us in prayer with her tender compassion and empathy.  Julie is always cheerful and gives the best hugs.  Julie is faithful to teach the gospel wherever God gives her opportunities.
In Julie, I value her joyfulness, her love to understand scripture and her imaginative mind.
Kathy is encouraging and has a joyful spontaneity that is enjoyed by all who know her.  Her gift of hospitality spills out of her home and into wherever life takes her.   She is a skillful communicator and efficient in managing her time.
In Kathy, I value her inclusivity, her words that encourage and her sense of responsibility.
Kathy and Marg have been our sponsor liaisons.
Marg has a delightful adventurous spirit. She has shown us what courage and faith look like when tragedy strikes.  Behind the scenes, Marg has organized our schedule for our Bread for the Journey Sunday devotionals.
In Marg, I value her joy in nurturing, her generosity and her authenticity.
We are so very thankful for you our readers that have given us a platform to share our joy of hospitality!
   We want to leave you with a blessing from the Bible.
“The Lord bless you
and keep you;
the Lord make His face shine upon you
and be gracious to you;
the Lord turn His face towards you
and give you peace.”
Numbers 6:24-26 NIV

K is for…

For April I’m challenging myself to an A-Z photo a day excluding Sundays and in addition to any regular posts that come to be.

Today is Saturday, April 12th, and we are on the letter K.

K is for our kitchen in Kenmore with Kulich (Paska as some know it) as the centerpiece for our Easter meal celebration and our Katie in the Kitchen. Here is a link to our family baking our mom’s Kulich (Paska~Russian Easter Bread)  and the recipe. 

Katie in our kitchen in Kenmore, above and below.

Our Kenmore kitchen when we listed our home for sale in 2018.

This post is landing on our Son-in-law Andrew’s birthday. Happy Birthday Andrew! We are so thankful to our God for bringing you into our family.

Creamy Chicken Enchiladas

My sister made this dish for me and her when I was visiting in California and I wanted to try them out at home with a few modifications. It’s a messy process with a tasty result.

Ingredients:

  • 2 tablespoons vegetable oil
  • 1 onion, rough chopped
  • 1 pound tomatillos, husks removed, washed and rough chopped
  • 1 Poblano chile, seeded and rough chopped
  • 1 Anaheim or Jalapeno chile, seeded and rough chopped
  • 4 cloves of garlic, smashed
  • 1/2 teaspoon salt
  • 1/2 teaspoon pepper
  • 2 cups fresh cilantro
  • 1-1/2 cups Mexican Crema or sour cream
  • 3 cups shredded rotisserie chicken
  • 1 cup frozen corn
  • 1-1/2 cups or more grated Mexican cheese blend, or Monterey Jack.
  • 10-12 corn tortillas

Tomatillos are also called “tomate verde” in Mexico (which means green tomato) and are considered a staple in Mexican cooking.  Tomatillo is a member of the nightshade family, related to tomatoes.They grow in a husk.

Method:

  1. Preheat oven to 425 degrees.
  2. Heat oil in large skillet over medium heat.
  3. Add the onion and cook for 4 minutes, stirring occasionaly.
  4. Add the chiles, tomatillos, garlic, and seasonings to the onions and cook for 8-10 minutes.
  5. Transfer the vegetable mixture to a food processor, add the cilantro, and pulse to a rough chop.
  6. Add the crema and puree until smooth.
  7. Taste sauce and add more salt if needed.
  8. Spread 1-1/4 cups of this sauce in bottom of a greased 9×13 baking dish.
  9. Transfer the remaining sauce to a medium sized bowl.
  10. In a large bowl combine chicken and 3/4 cup of the sauce.
  11. Add the corn and 3/4 shredded cheese to the chicken mixture.
  12. Wrap the tortillas in double layer of damp paper towels; microwave on high until soft, about 1 minute.
  13. Working with one tortilla at a time, dip in the remaining sauce in medium bowl shaking off any excess.
  14. Place on a work surface like a large plate or cutting board (this is the messy part!).
  15. Add about 1/2 cup of the chicken filling, roll up and place in baking dish seam side down.
  16. Repeat the process with the remaining tortillas and filling, I had enough filling for 10 tortillas.
  17. Spoon any remaining sauce on top of the rolled tortillas.
  18. Sprinkle remaining grated cheese evenly on top, cheese lovers can add more cheese if desired.
  19. Bake until the cheese begins to brown, 12-15 minutes.
  20. Serves 4-6 people.

Although there are many steps to making these creamy Suiza style enchiladas the effort is worth it. If you like heat add one or two jalapeno chiles instead of the Anaheim chile.

I found that with all the sauce and the melted cheese it was hard to distinguish each enchilada. Just split up the pan in even portions for your family or friends.

Brisket Chili

I was intrigued when I saw a chili recipe using brisket and decided to adapt it to our liking. The meat was so nice and tender at the end. This is a recipe that will feed a group of 20 easily. My photo at the end shows the chili with more of the toppings we had available to add. As usual you should adjust the seasonings to your own liking or tolerance of spices.

Ingredients:

  • 5 pounds of brisket, cubed. (I had the butcher chop it up for me)
  • 1/4 cup olive oil
  • 1 large sweet onion chopped
  • 3-6 cloves of garlic, minced
  • 2 tablespoons chili powder
  • 2 tablespoons ground cumin
  • 1 tablespoon red pepper flakes
  • 2 teaspoons cayenne pepper
  • 2 red peppers, seeded and chopped
  • 1 bay leaf
  • 2 – 28oz. cans of chopped tomatoes
  • 1 tablespoon salt (or to taste)
  • 1 teaspoon freshly ground pepper
  • 1 12oz. bottle of dark sweet beer (Imperial Russian Stout) optional
  • 2 (approx. 15 oz.) cans beans of your choice (I used pinto)
  • 1/4 cup chopped cilantro leaves

Suggested toppings:

  • Chopped fresh tomatoes
  • Grated cheese
  • Chopped avocado
  • Chopped cilantro
  • Chopped green onions (scallions)
  • Sour Cream

Method:

  1. Heat oil in heavy bottomed large dutch oven pot and brown meat in batches.
  2. Remove the meat and keep separately in another container.
  3. In the meantime saute the onion and garlic in the same large pot over medium heat till softened.
  4. Add the chili powder, cumin, pepper flakes, and cayenne pepper and saute for 1 minute.
  5. Add the red peppers, bay leaf, tomatoes with juice and return the meat to the pot.
  6. Add the salt and pepper and bring to a boil.
  7. Reduce heat and cover pot tightly and simmer for 2 hours, stirring occasionally. Taste and add more seasonings if needed.
  8. Add the beer, cover pot and simmer for another hour or more.
  9. Add the beans and cilantro and heat through.
  10. Serve with suggested toppings or your favorites.

A salad, saltines, or cornbread would be nice along with the chili.

Apple Tart

I found this post in my drafts and thought I better post it before it gets lost. This was a Christmas treat in the past but would work for any occasion. This recipe was posted on Mennonite Girls Can Cook in January of 2014. Since it is George Washington’s birthday today and he grew many apple trees on his property at Mt. Vernon it’s a good day to share this with you.

Our son has apples trees on his property and he prepared apples by coring, peeling, and slicing them then preserving them with his Food Saver and freezing them. I decided to use his apples for our Apple Tart that we enjoyed on Christmas day years ago. Posting this before it gets lost in drafts.

Crust:
1-1/2 cups flour
1/2 cup quick oatmeal
3/4 cup finely chopped walnuts
3/4 cup light brown sugar, packed lightly
3/4 cup unsalted butter-cut into small cubes
1 egg yolk

6-7 fresh apples
juice from half a lemon
2 tablespoons sugar

Cut the apples lengthwise into quarters, core the apple, and slice into smaller sections, about 8 slices per apple. You’ll need 6-7 apples for this recipe. After the apples are sliced put them into a bowl and add the lemon juice and sugar and toss lightly. This will allow them to juice slightly.

Preheat oven to 400 degrees.

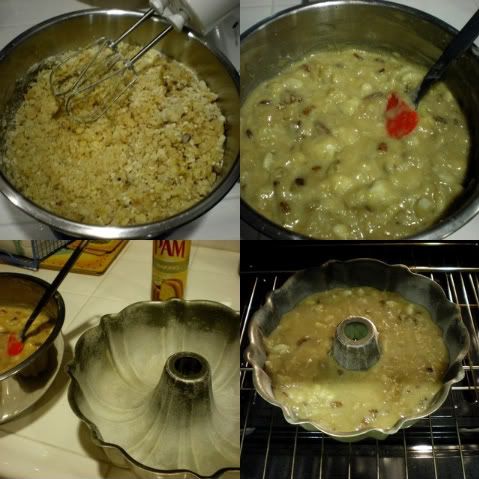
Combine flour, oatmeal, walnuts, and sugar, butter and egg yolk in bowl. Mix ingredients until they are a crumb size. You can use a mixer.

Pour the mixture into a 10 inch tart pan and press to an even layer coming up the sides of the pan, also.

Arrange the apple slices starting on the outside edge going around in a circle and then start the center circle with the remaining apple slices. Save the apple juice left in the bowl to brush the apples when the tart is fully cooked and out of the oven. This will add a nice sheen to the tart. If you don’t have enough juice for this step add a little water and sugar to the apple juice you have and cook it on the stove top till it thickens slightly.

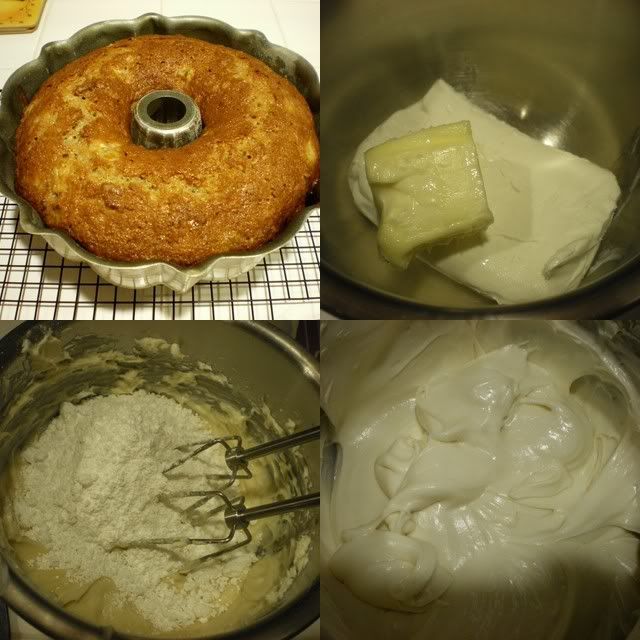
Bake the tart for 35-40 minutes or until it’s lightly browned. Remove from oven, cool slightly and enjoy warm or after it has cooled completely. It would be nice with a dollop of whip cream or a la mode.

Note: I reserved a tablespoon of the crumb crust to add on top of the apples in the center of the pan before baking the tart. That is an optional step.

I also had extra crumb crust and apples so I made a small crumble, too.

Coeur A la Creme

This is a fluffy sweet cheese/cream dessert that has a great presentation for Valentine’s Day but a nice treat any time.
I use a Coeur a la Creme mold that I bought at a specialty kitchen store but you can use any 7 inch sieve.

Coeur a la Creme with Strawberry Sauce

Ingredients:
8 oz. ricotta cheese
1 cup confectioners sugar
2 cups heavy whipping cream
1-1/2 teaspoons vanilla
seeds scraped from 1 vanilla bean
1/4 teaspoon lemon zest

Sauce:
1 pound frozen or fresh strawberries
1/2 cup water
1 Tablespoon fresh lemon juice
6 Tablespoons sugar

With the paddle attachment beat the ricotta cheese and confectioners sugar in the bowl of an electric mixer for 2 minutes. Scrape down the bowl. Change to a whisk attachment. With the mixer on low speed, add the heavy whipping cream, vanilla, lemon zest, and vanilla bean seeds and beat on high speed until the mixture is very thick, like whipped cream.
Line your mold or sieve with cheesecloth or paper towels so the ends drape over the sides and suspend over a bowl, making sure there is space between the bottom of your mold/sieve and the bottom of the bowl so liquid can drain. Pour the cream mixture into the cheesecloth, fold the ends over the top, and refrigerate overnight.
For the sauce place the strawberries, sugar, lemon juice and water in a small saucepan. Bring to a boil, lower the heat, and simmer for 4 minutes. Pour the cooked strawberries into the bowl of a blender and blend until smooth. Chill.
You could substitute raspberries for the strawberries to make the sauce.

To serve, discard the liquid, unmold the cream onto a plate, and drizzle strawberry sauce around the base. Serve with strawberries and extra sauce.